 Having a picture of yourself on your website or business blog helps to build the relationship between you and potential customers, particularly if it is a smiling one of you! Many of us shy away from having our photos taken or having to see our image on a daily basis on our blog but do remember that people buy from people, people like to see what you look like and investing in having a professional photographer take your photograph is well worth the money.
We had an image of both of us on the homepage of the site but are making some changes and have decided to have the blog as the home page for the timebeing. I decided to place an image in the top right of the blog sidebar. If you’d like to do something the same in your wordpress blog, this is how you do it.
How To Add An Image To The Blog Sidebar
- I created a collage of two photographs in picmonkey and resized them.
- To add an image to the sidebar, you will need to use the ‘text box’ widget which means that you need the html text for the photograph first.
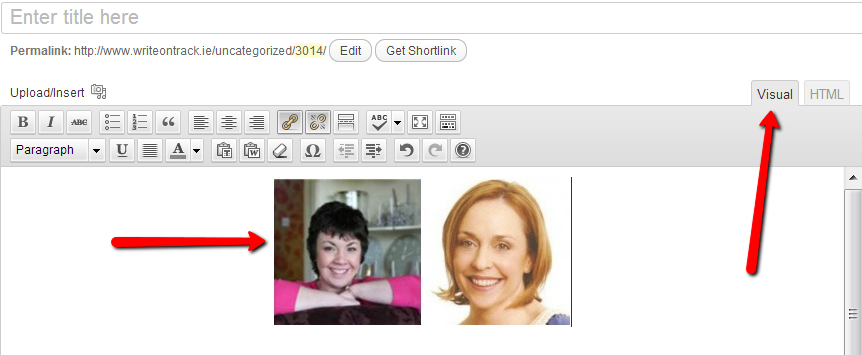
- Create a draft post and upload the photograph you wish to use. As you can see in the screenshot below, the photograph is visible as I am using the ‘visual tab’ which is indicated by the red arrow.
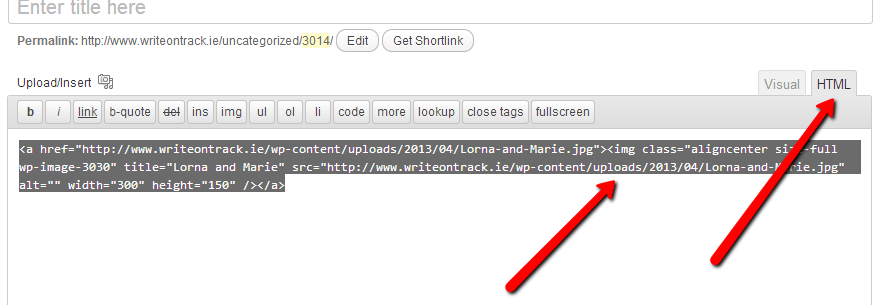
- To get the html code, you need to click on the html button (indicated by the red arrow) and copy the text that is now visible.
- Next, go to Appearance (in your dashboard) and click on ‘Widgets’.

- Click on the text box and drag it over the the right side so it is slotted in under your ‘primary sidebar’.
- Paste in the html code you copied earlier and add a title if you wish.
- Click Save.
- Open up your blog in a new tab and check that the photograph looks fine.
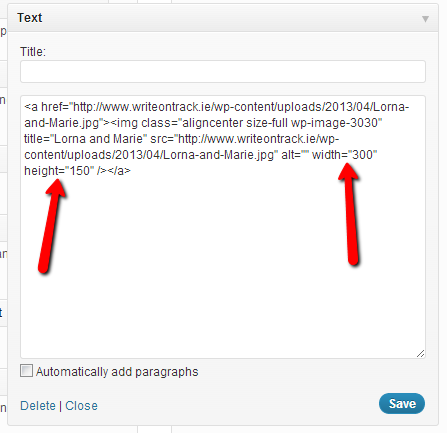
- The width of our column is 300 and I had already sized it as such, with the height being 150. However, if the photo was too wide or too narrow for the sidebar, you can alter one of the measurements as indicated in the screenshot below and the other will change automatically (so the aspect ratio remains the same).
- The last thing to do is to ensure you are happy with the position of the image. If you wish to move it up or down, just drag it below or above any of the other widgets until you are happy.
- Well done – now go and install your first image in your sidebar. If you have any questions about the process, do ask in the comments below. If you found this useful, do share it by using one of the buttons below


